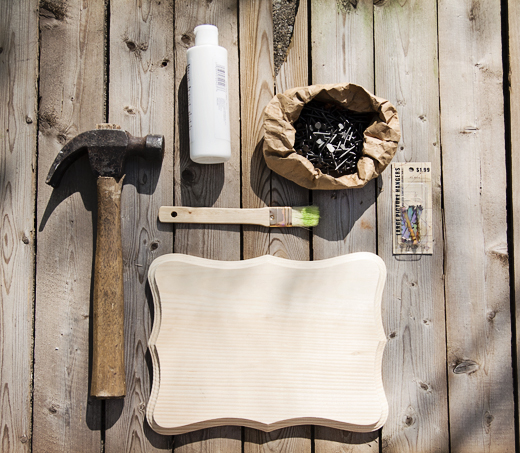
 This has to be one of my favorite projects so far. I love the organized chaos of it! I've been seeing this project all over Pinterest and have been dying to do it myself. Even though I'm posting this in May, I did finish it last week, so it still counts for April ;) Since I'm trying to keep costs down, I used as much as I could of what I already had on hand. I already had the white acrylic paint and paintbrush, Bear already had the nails and hammer. I got the plaque and nail-in hangers at Hobby Lobby for <$5 a couple months ago for something else, but ended up not using either. There were several hangers in the pack, so I got to use one for this project and have a couple left over. I'll probably use one or two for my birch tree painting so that I can actually hang it up and not have it sitting on a shelf. The only thing I needed (not pictured) was the yarn. I got finger weight cotton yarn at Hobby Lobby for <$3. The nails Bear had ended up being a little too big, so I got some 3/4" (18 gauge) nails at Wal Mart for <$2. Altogether, the project cost me less than $10, which is awesome, since finished products like this easily cost $25+. 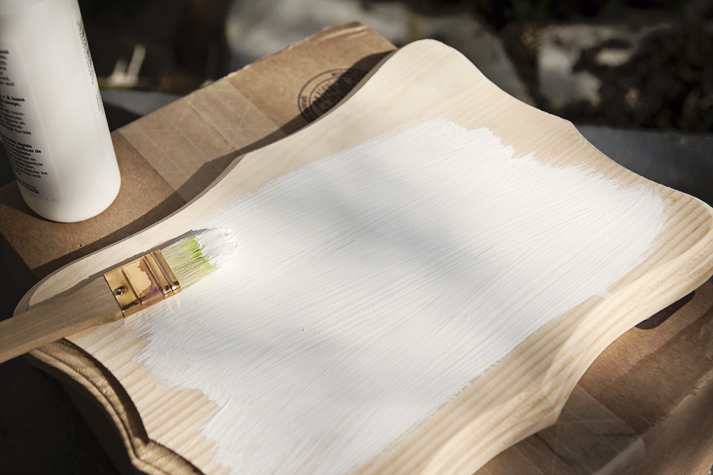 I started by applying a few layers of white acrylic paint, then let it dry overnight. In the meantime, I printed up the silhouette of the bear I used as an inspiration for my logo. The next day, once the paint was dry, I taped the silhouette to the plaque as centered as I could, and nailed around the outline. 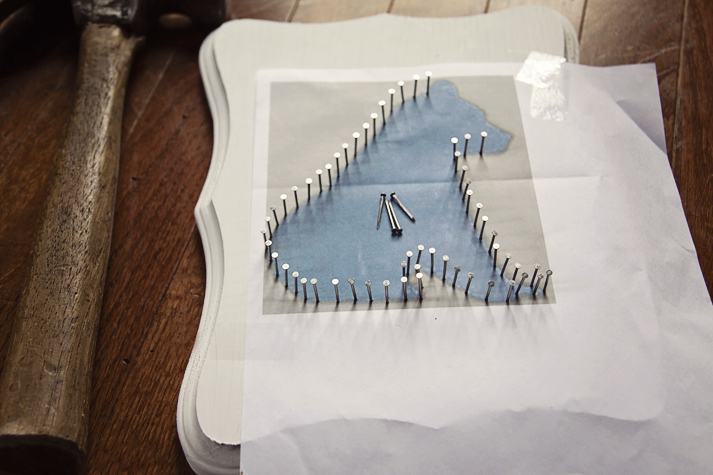 Once I finished nailing, I carefully pulled up the tape and tore off the paper. It was way easier than I thought it would be, and Bean even got to help some! 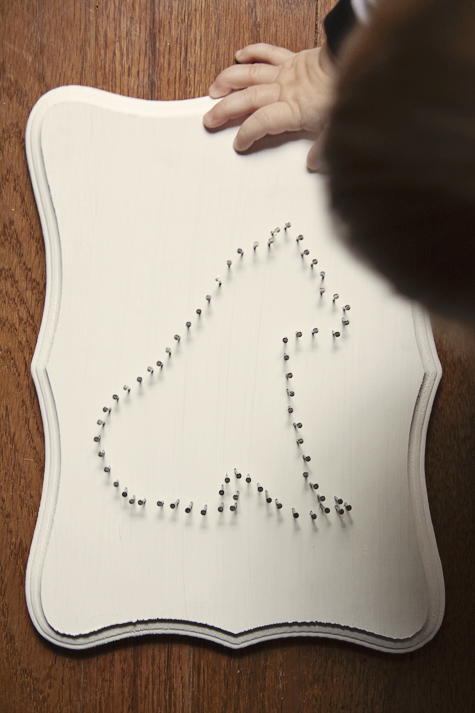 Bear had an excellent suggestion! In order to string the nails easier, I took apart a cheap pen I had, leaving myself with just the shell. I pulled the yarn through from the back out through the tip, knotted the end on a nail, and started stringing! This was by far my favorite part of the project. There was so much freedom in wrapping around random nails and watching the bear appear, with no specific steps to take. I made sure to wrap around each nail at least once, though some got 2-3 times, especially in the smaller places. Then I tied it off with Bear's help (seriously, 4 hands were needed for that part), and Bear hammered the hanger in the back, and it was all done! 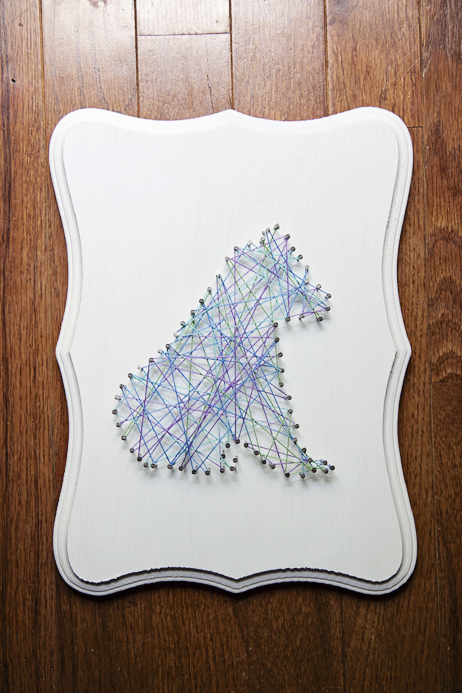 I honestly wouldn't mind having several of these around the house. I already have some ideas for pieces to do as gifts for specific people. (Can't say who or what yet, don't want to ruin it!) What would you do if you did one? Your state? An animal? Specific character?
Did this inspire you? I'd love to see any projects that you have!
0 Comments
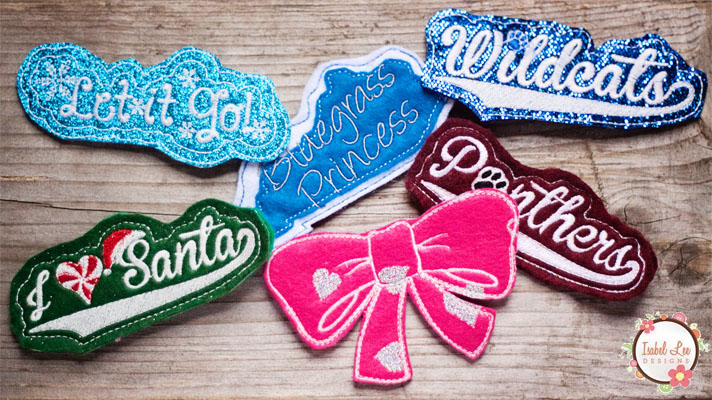 I recently got the itch to try my hand at some product photography. It's been so long since I have had a chance to be behind my camera regularly, and I wanted to try something new. Since all of the custom crochet pieces I've been making have been going to the post office as soon as I've finished them, I decided to ask a dear friend of mine to borrow some of her things. 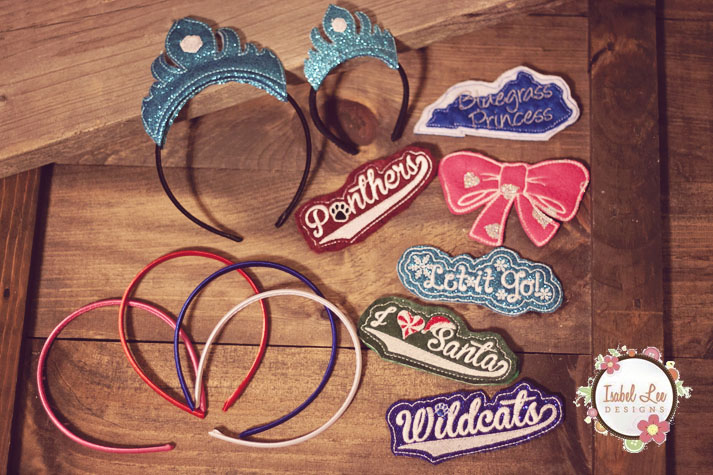 My friend Angie is the power behind Isabel Lee Designs, and she makes a TON of amazingly super cute embroidered things, including scarves, dresses, stuffed animals, stockings, and now THESE! 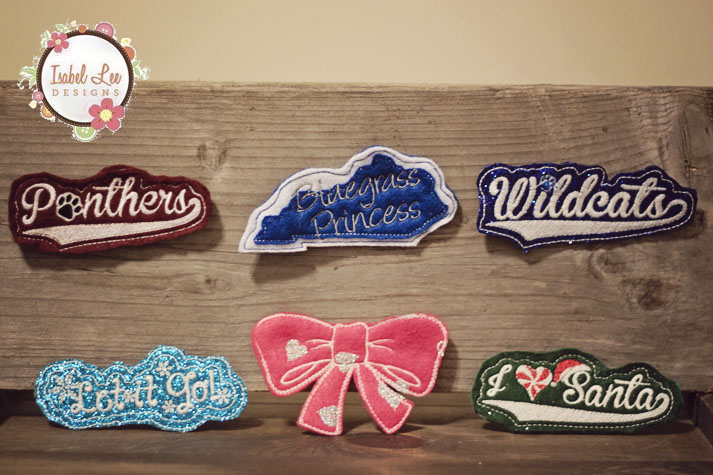 They're called headband slides, and they slip super easily onto these sweet, silky headbands. How ingenious are these? 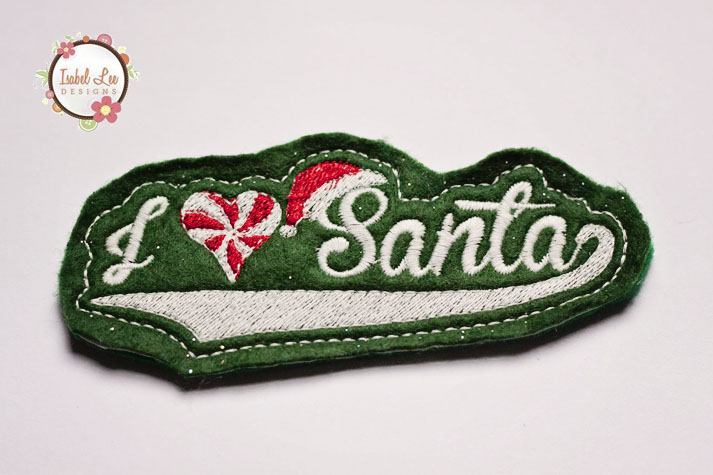 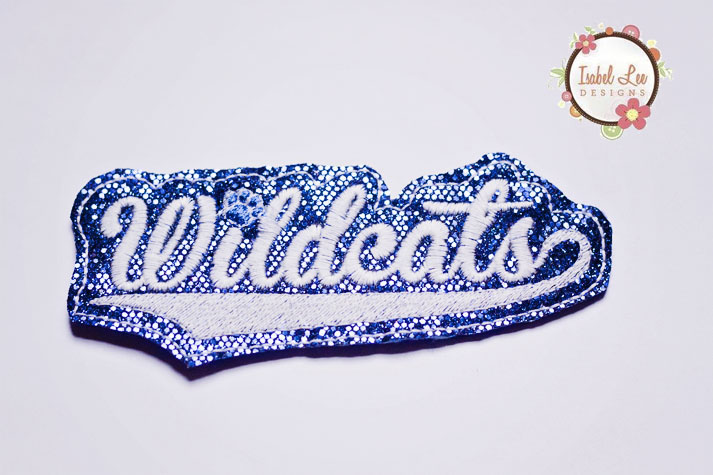 Stocking stuffers, anyone? I know, I have a boy, but I have several nieces, and these would be the most amazing presents for them! Especially since they're little and already have plenty of toys (and there's no small pieces, haha!). 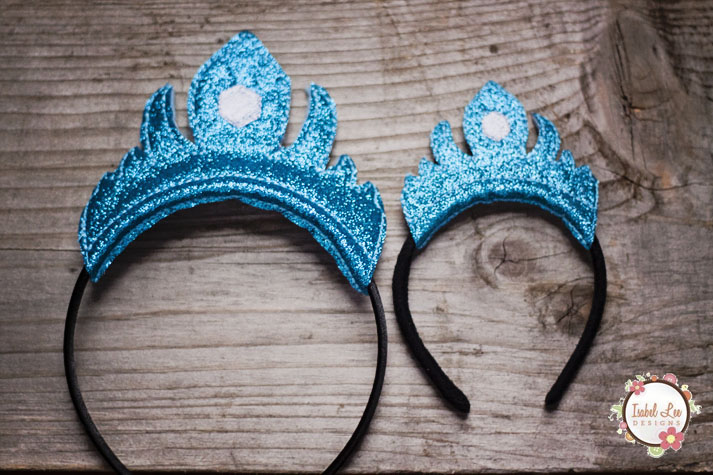 And get this - she can even make matching custom sliders doll-sized, so your princess and her princess can match! ^_^ A slide and headband set is $8, with additional slides for only $5! Doll sets are $6, with additional slides for $4. Just hit her up on her Facebook page for your custom order! 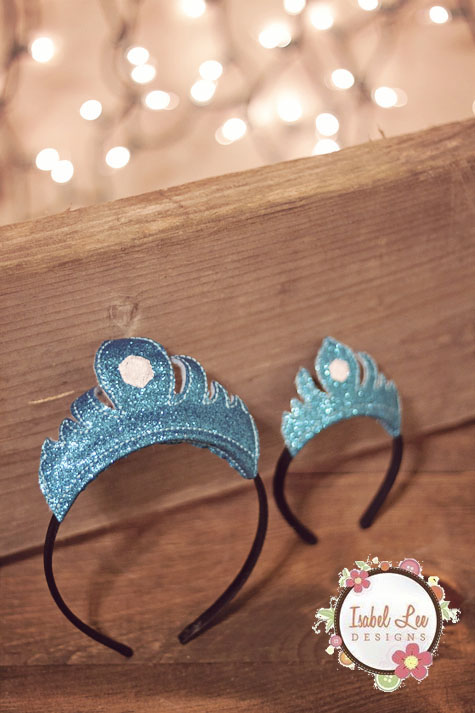 Want to know how awesome Angie is? She's offered to sponsor a giveaway here on the blog! One person will win a headband and slide set! Check out below how to enter :) The giveaway will be open for entries through Sunday, December 7th, at midnight. Winner will be announced and contacted Monday, December 8th. Good luck, friends!
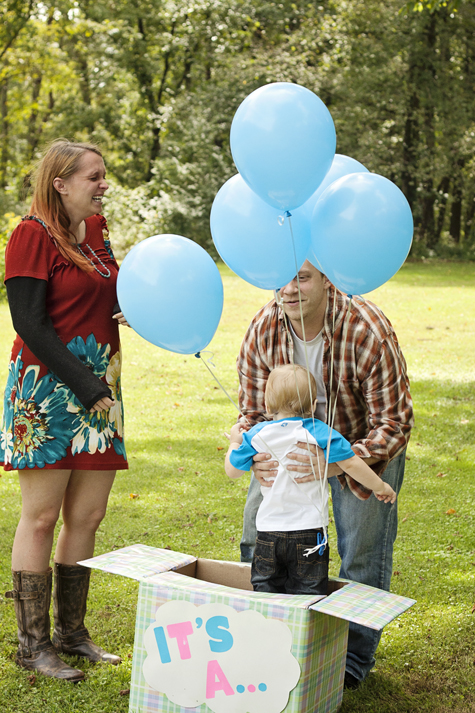
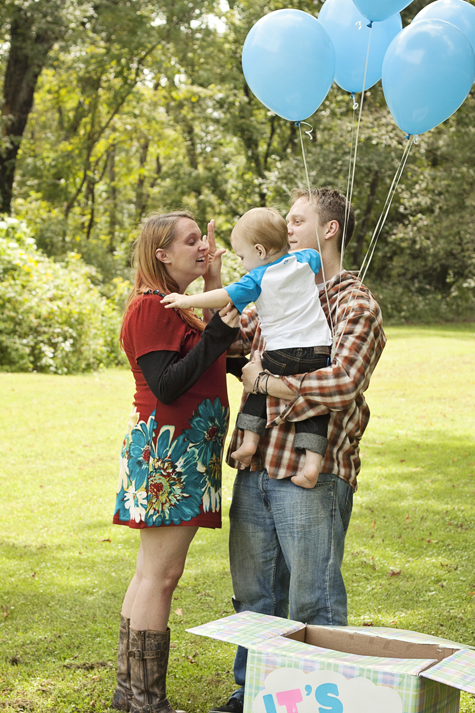
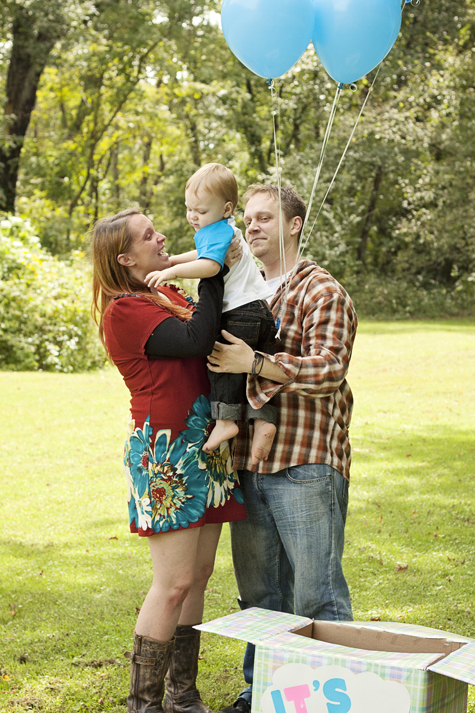
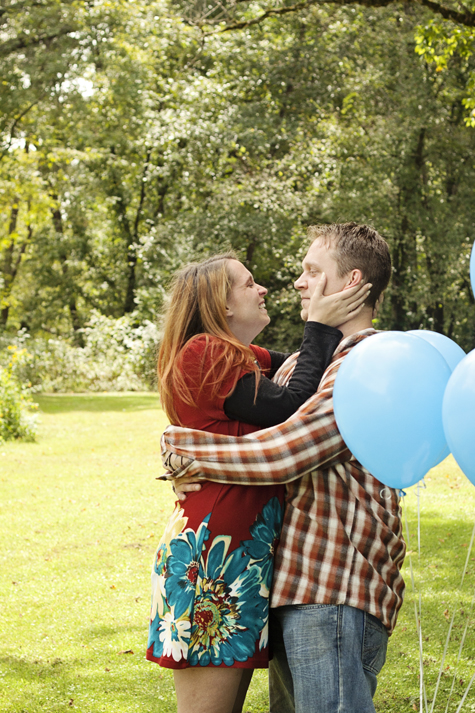
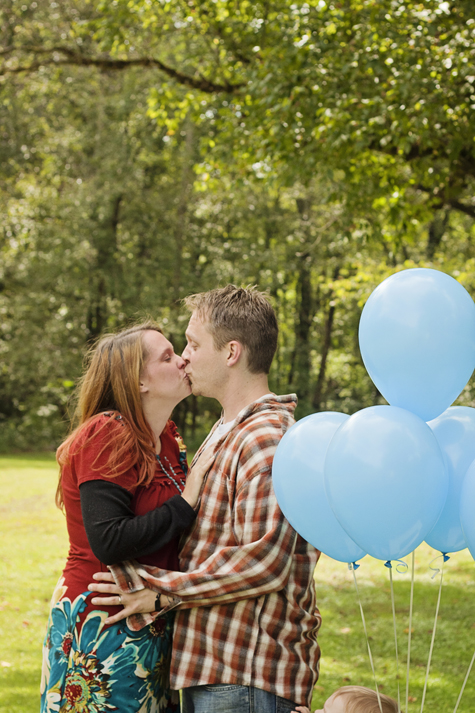
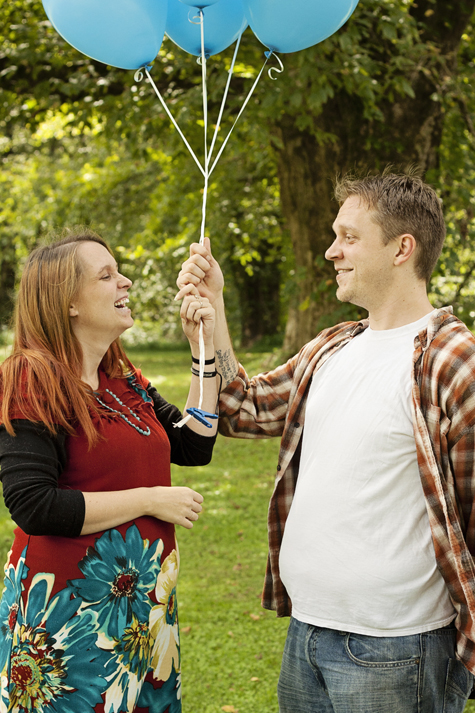
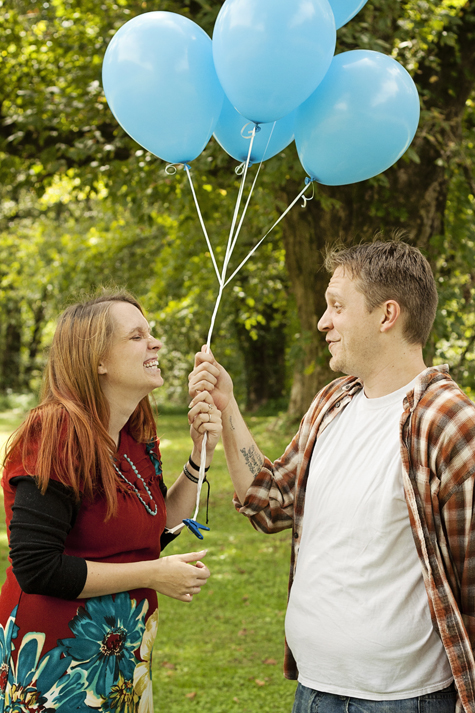
Less than a year ago, I moved to Eastern Kentucky to be with my family. I have been overwhelmingly blessed with so many great friends; Kimberly, her husband Joe, and their son Gage are no exception. A few weeks ago, I was able to document a bit of Kimberly and Gage's breastfeeding journey. I was so excited when they asked me to capture another special moment: the Gender Reveal of #2! Kimberly's mom got the balloons and we all met at the local park. Lots of smiles, laughs, and a few tears quickly followed! 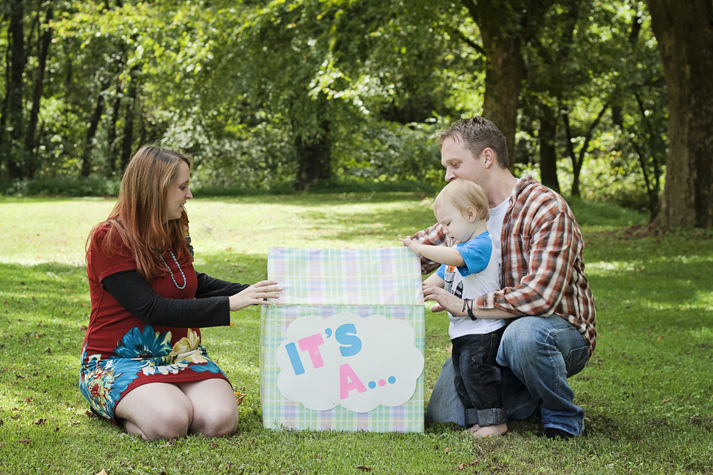 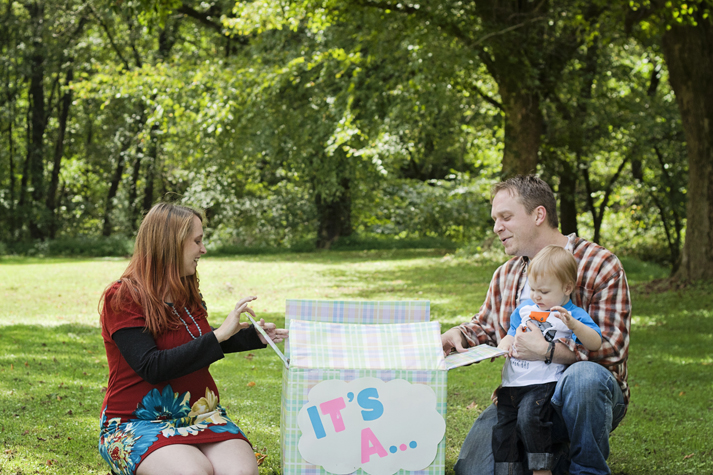 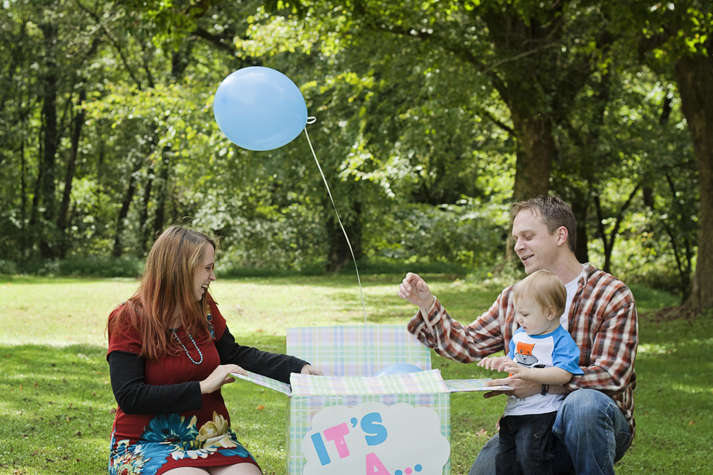 BOY! 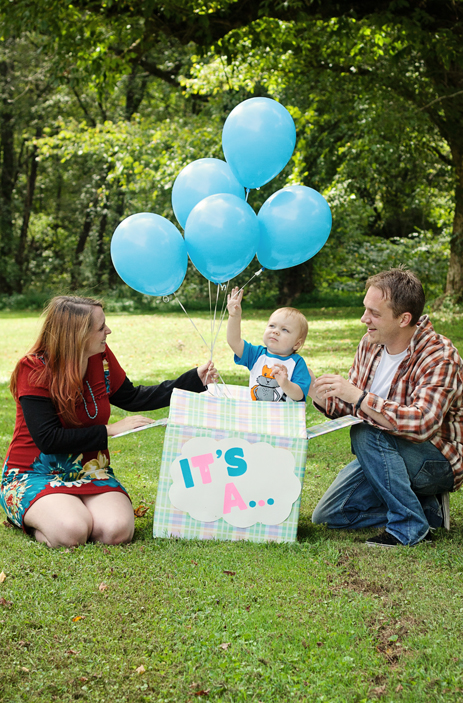 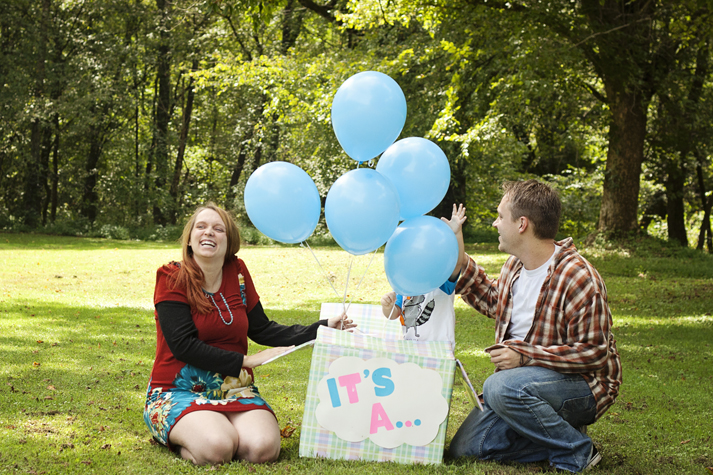 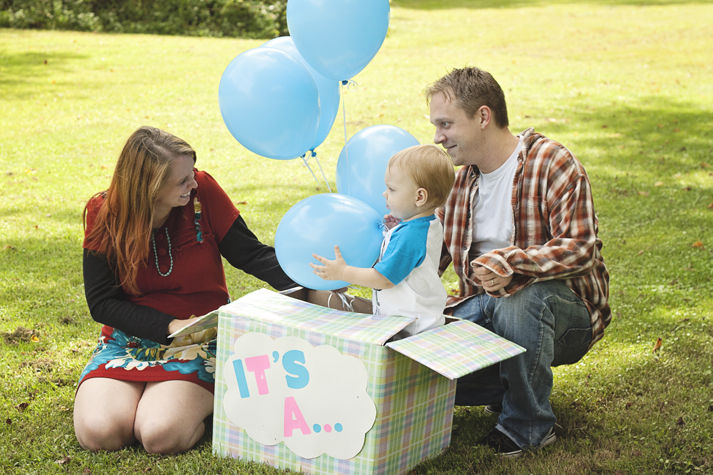 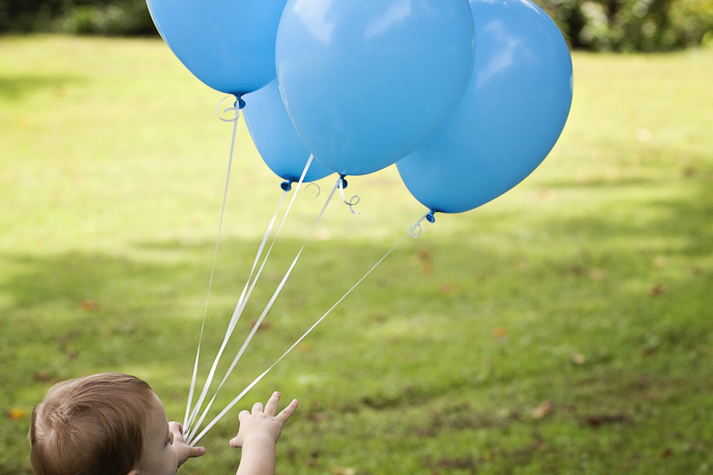
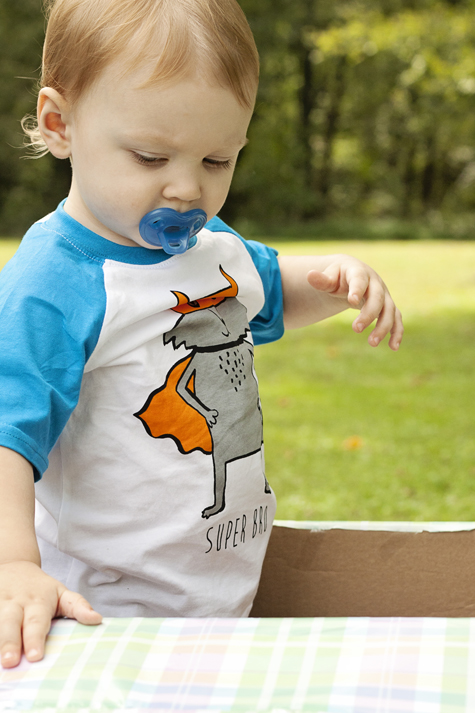
 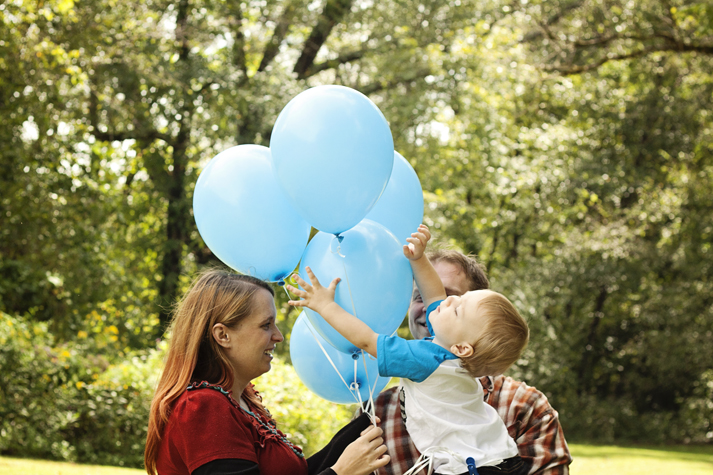 Super (big) Bro Gage loved the box!
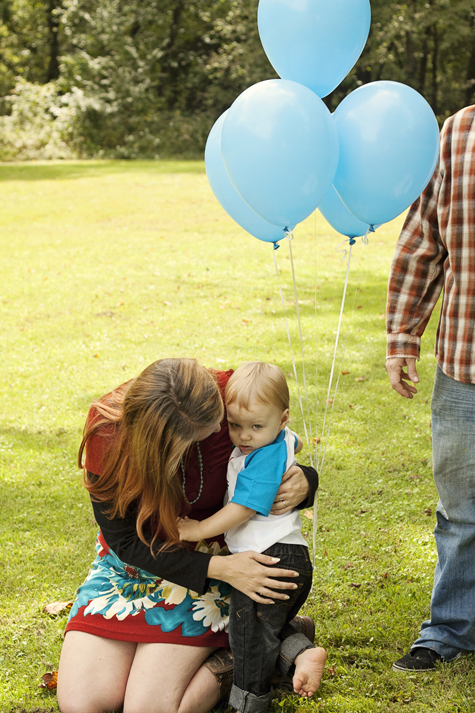
Grandma gave him a flower... 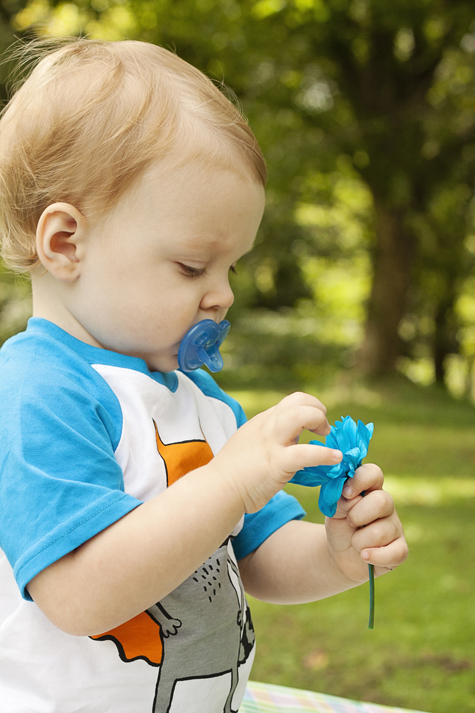 Aaaaaaand he decided to eat it! 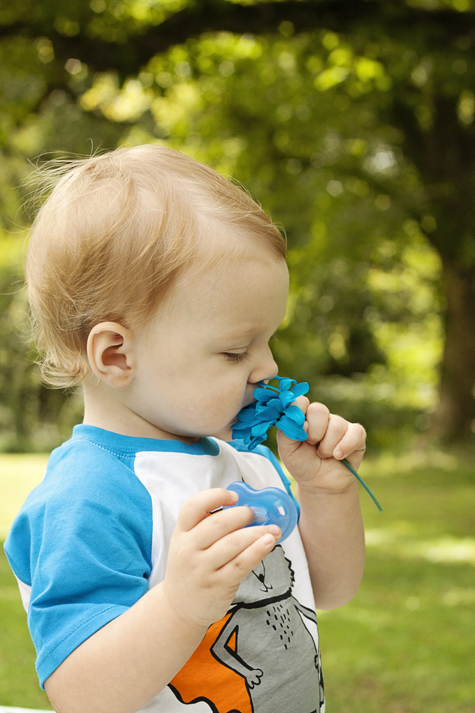 These two... <3333 staaaaahp!
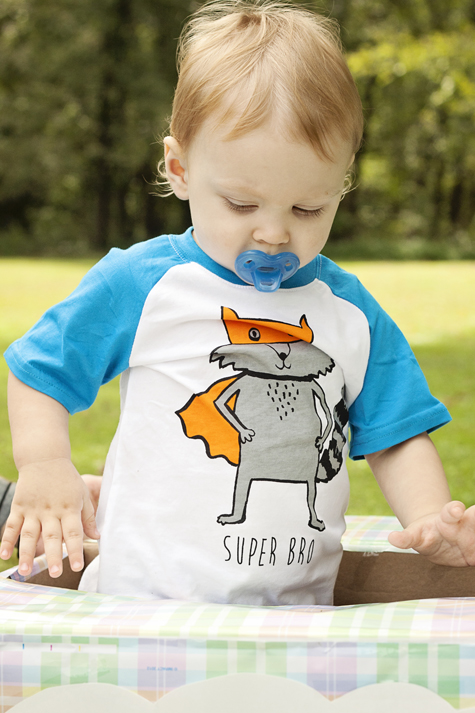
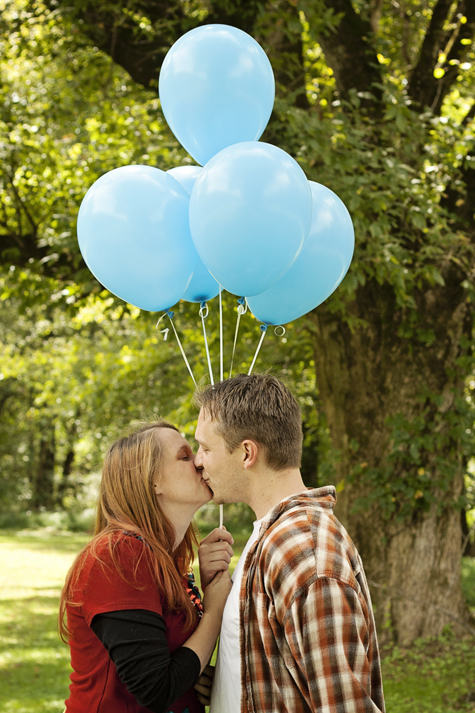 Super Bro enjoying the park! 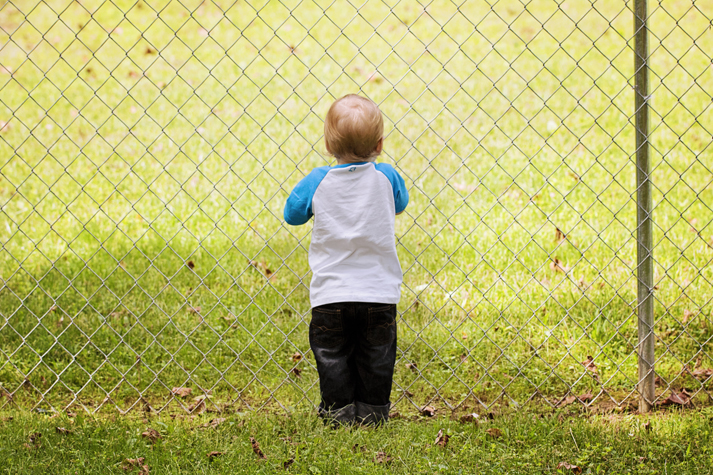 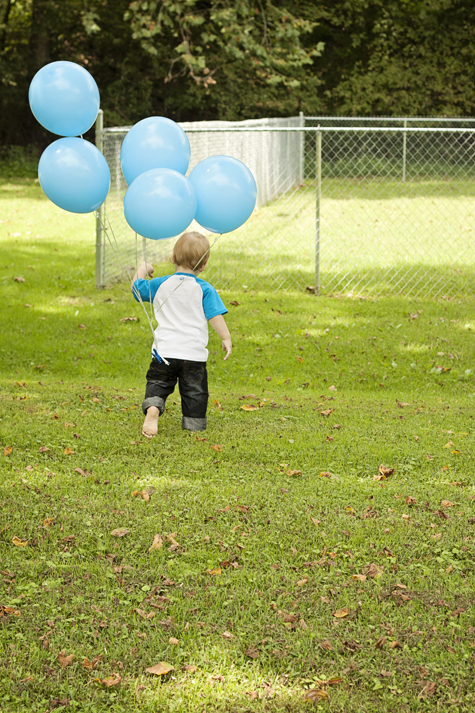  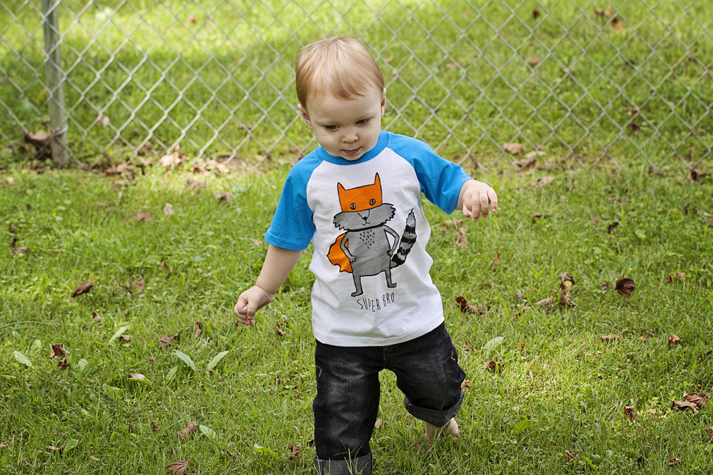 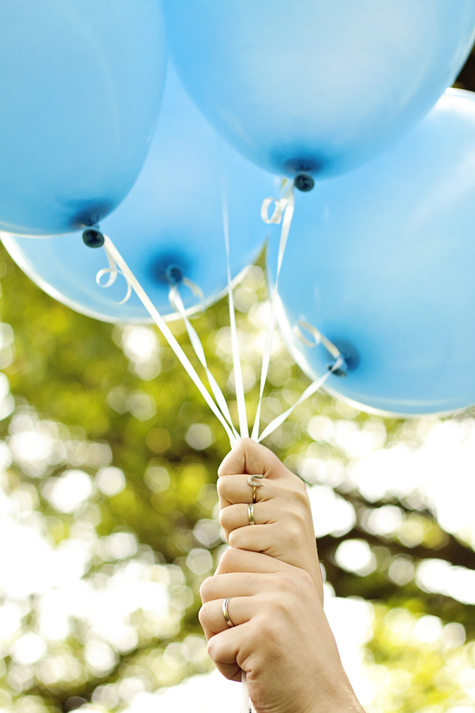 Congratulations again, my friends <3 I can't wait to meet baby Samuel!
|
Categories
All
AuthorMama Bear of one Baby Bear, Bean, who both love Papa Bear, and live in a crafty, gluten-free cozy den. Archives
June 2017
|


 RSS Feed
